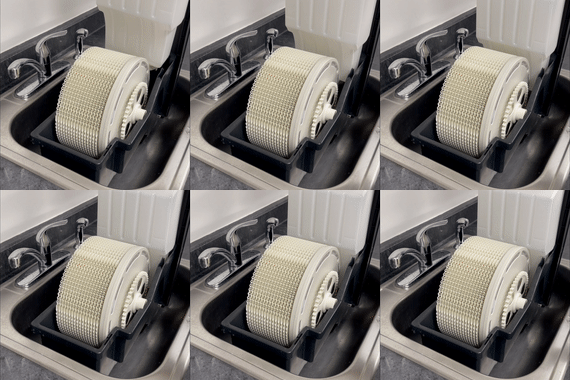
Tutorials
How to Clean the Metal Sensor Strips
If the red light is on (or the water indicator and flashing lines on the Comfort Plus and Original Connect Series’) despite having adequate water in the Lower Housing of your unit, and the Upper Housing is properly placed on the Lower Housing, then your sensor strips may need to be cleaned. Follow the instructions below to learn how to clean the sensor strips. If you are still having red light or water alert issues after the cleaning, please contact us using the Live Chat on our website, by calling 888-333-8218, or by emailing us at [email protected].
Step 1
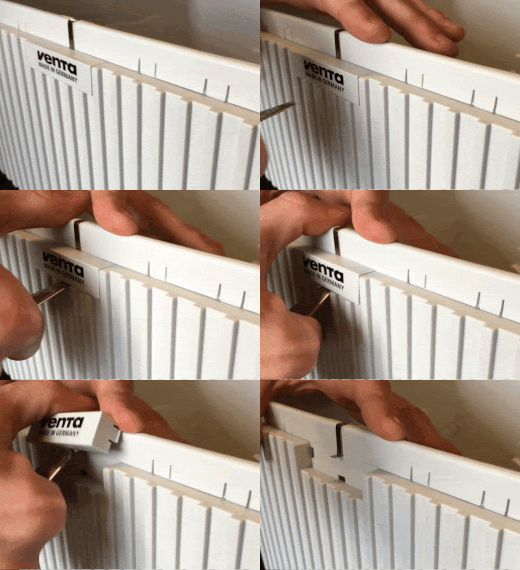
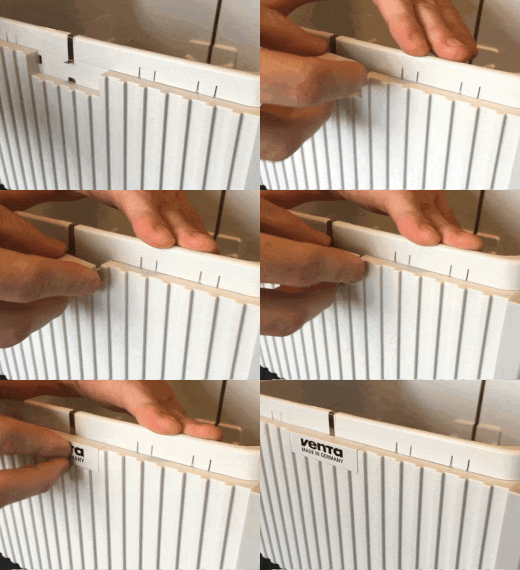
On the outside of the lower housing, locate the snap tab that shows “Venta Made in Germany”. Use a knife or screwdriver to pry the tab from the bottom.
Step 2
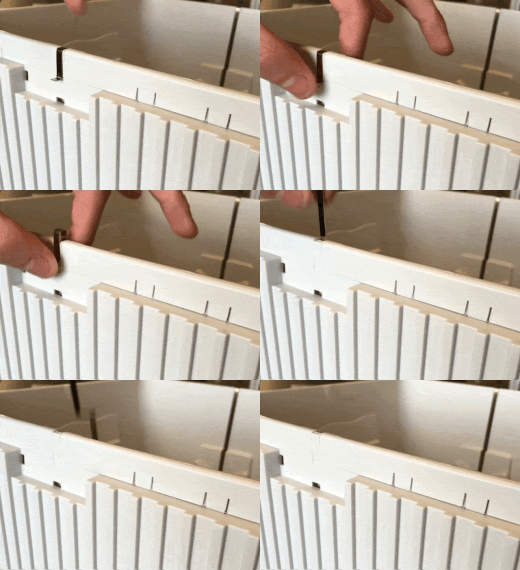
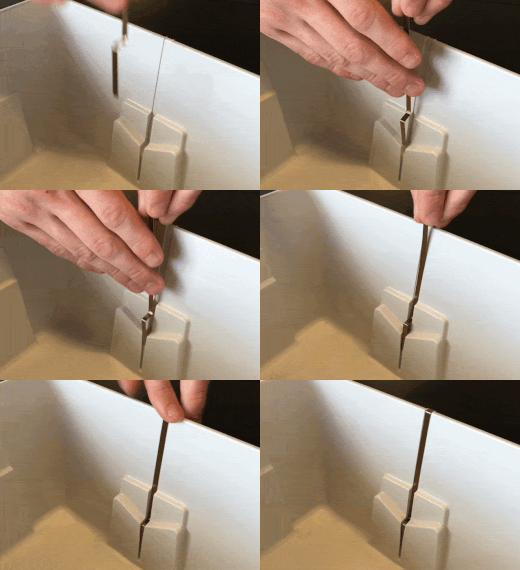
Lift the metal sensor strip up and gently remove it from the top edge of the lower housing.
Step 3
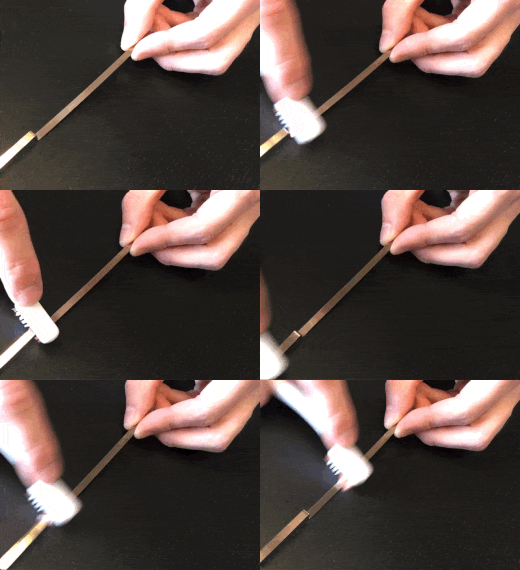
Clean off the build-up and any film that may have collected on the metal sensor strips. A common dishwashing sponge or toothbrush works well along with some warm water and white vinegar.
Step 4
Place the metal sensor strip back in place. Make sure the metal sensor strip is secure with the lower part tightly in the bottom and the top part of the strip is hanging over the edge. Helpful hint: put the lower part of the metal sensor strip in first so that it is secure.
Step 5
Snap the “Venta Made in Germany” tab back in place.
How to Replace the Gear Box
If you have purchased a new gear, follow the instructions below to properly replace the gear. If you have any questions, please contact us by calling 888-333-8218, or by emailing us at [email protected].
Step 1
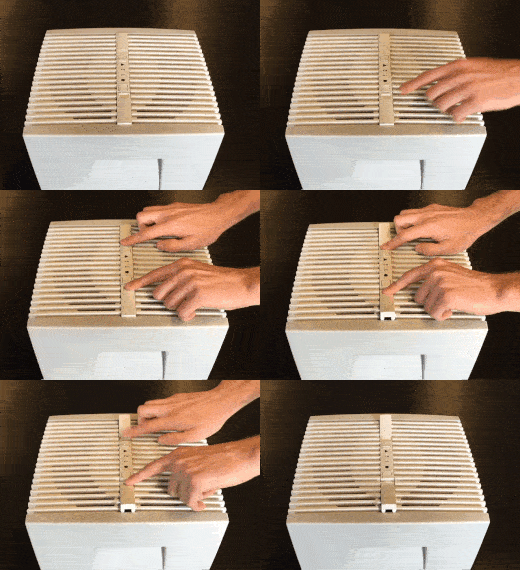
Press the tabs to the right and left of the speed controls in the center top of the upper housing unit to open the humidifier. Press the tabs at the same time.
Step 2
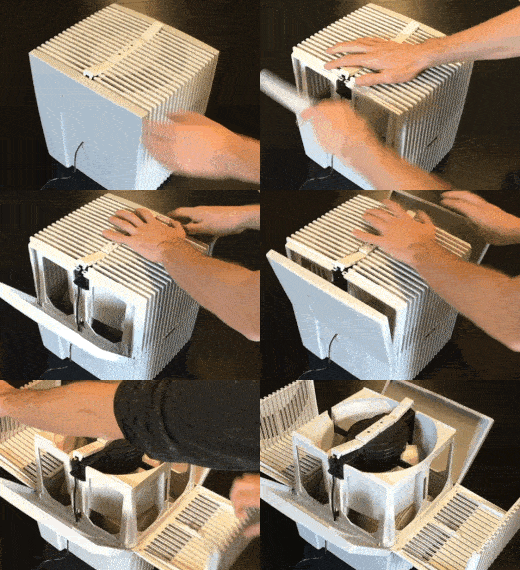
Pull the two vented and two non-vented sides to open the upper housing unit. Start with the non-vented sides followed by the two long vented sides. For older models (LW14/LW24/LW44) start with the long vented sides first.
Step 3
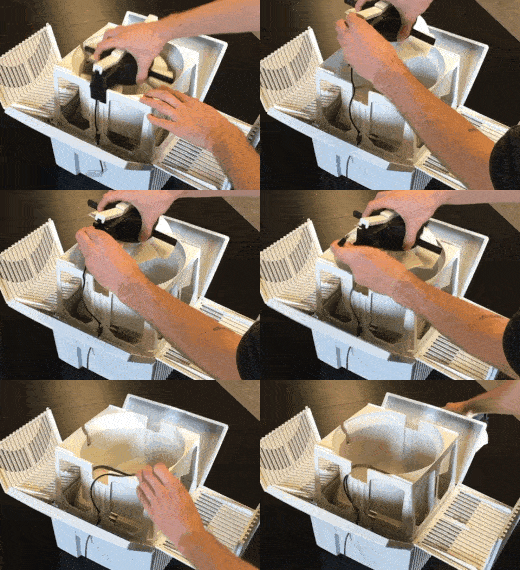
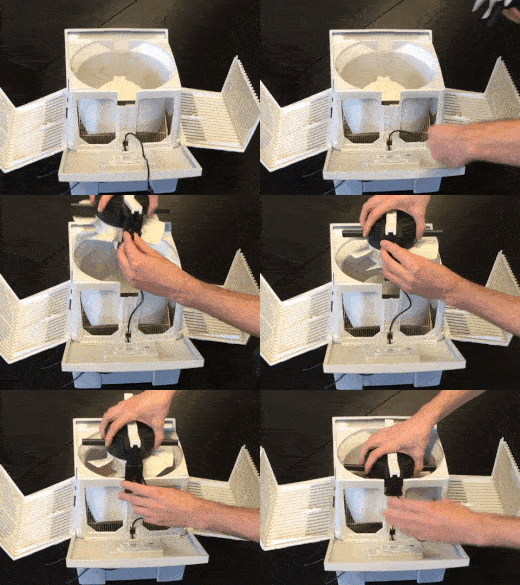
Unplug the power cord from where it connects to the motor (on the older model humidifiers the power cords are permanently attached to the motor and you will need to open the trap door on the left non-vented side to pull the cord inside the unit). Lift the entire motor and cord away from the upper housing unit.
Step 4
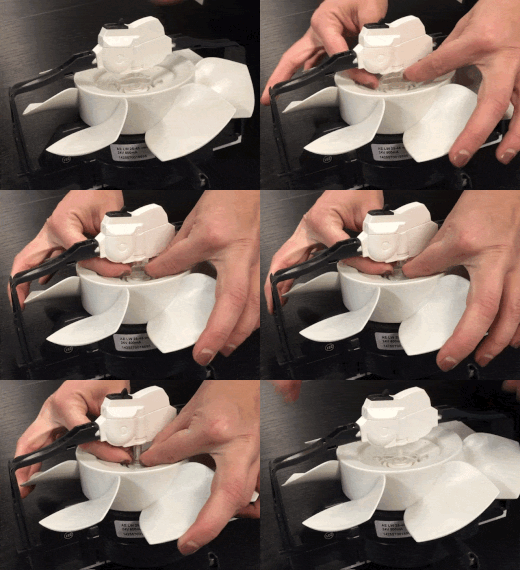
Remove the rubber coupling from the gear box by pushing the coupling down toward the fan and away from the gear. Gently pull gear away from the rubber coupling until the attached nipple is disconnected.
Step 5
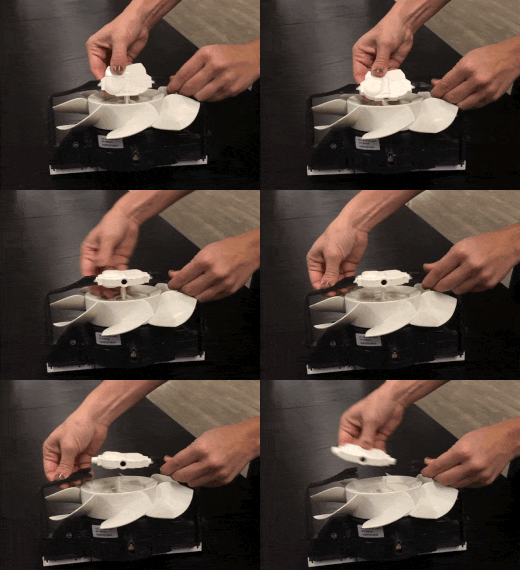
Pivot (turn) the gear 90 degrees so that it is lying on its side. Gently pull one of the two motor housing arms approximately 1/8 of an inch away from the gear and remove the gear from the motor assembly.
Step 6
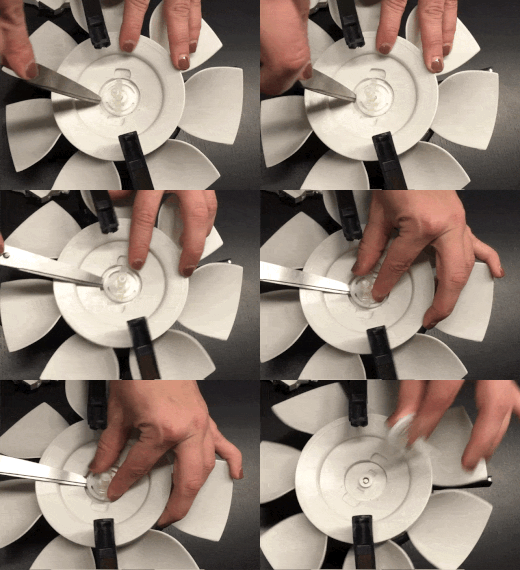
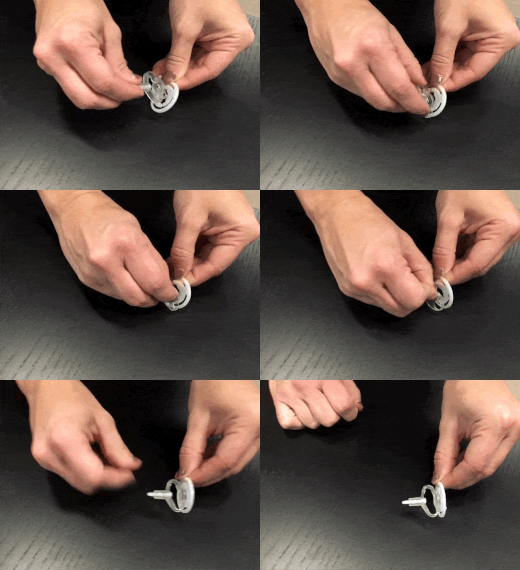
Remove the locking ring from the center shaft of the fan by prying it up using a pair of scissors.
Step 7
Place the rubber coupling into the locking ring so the rubber feet from the coupling hang below the ring. When placing the coupling and ring on the center shaft of the fan the rubber feet should line up with the notch marks on the fan.
Step 8
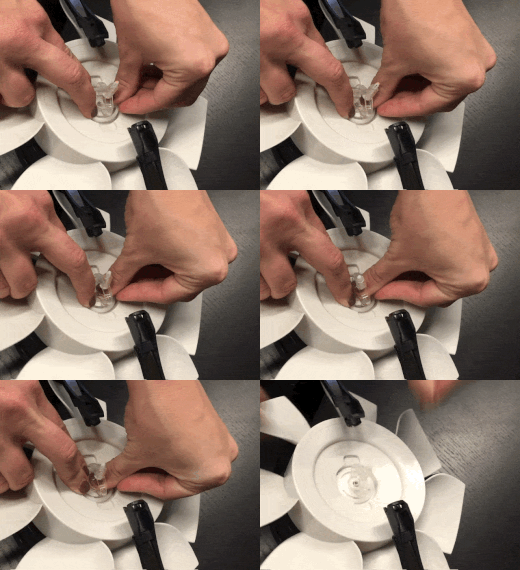
Snap the ring and coupling into place on the fan.
Step 9
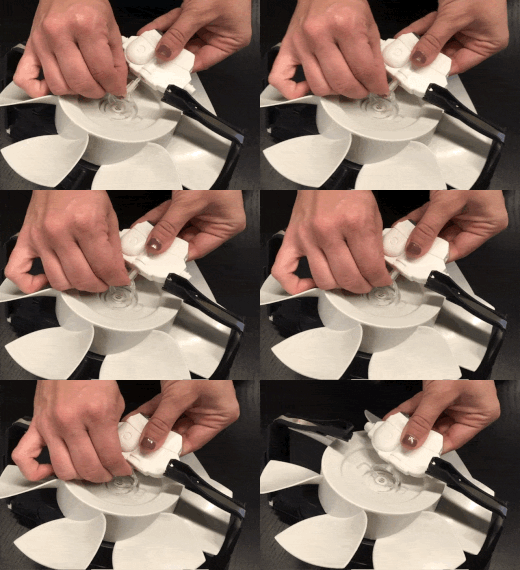
Insert the rubber pin of the coupling into round hole on the top of the gear until it fits tight.
Step 10
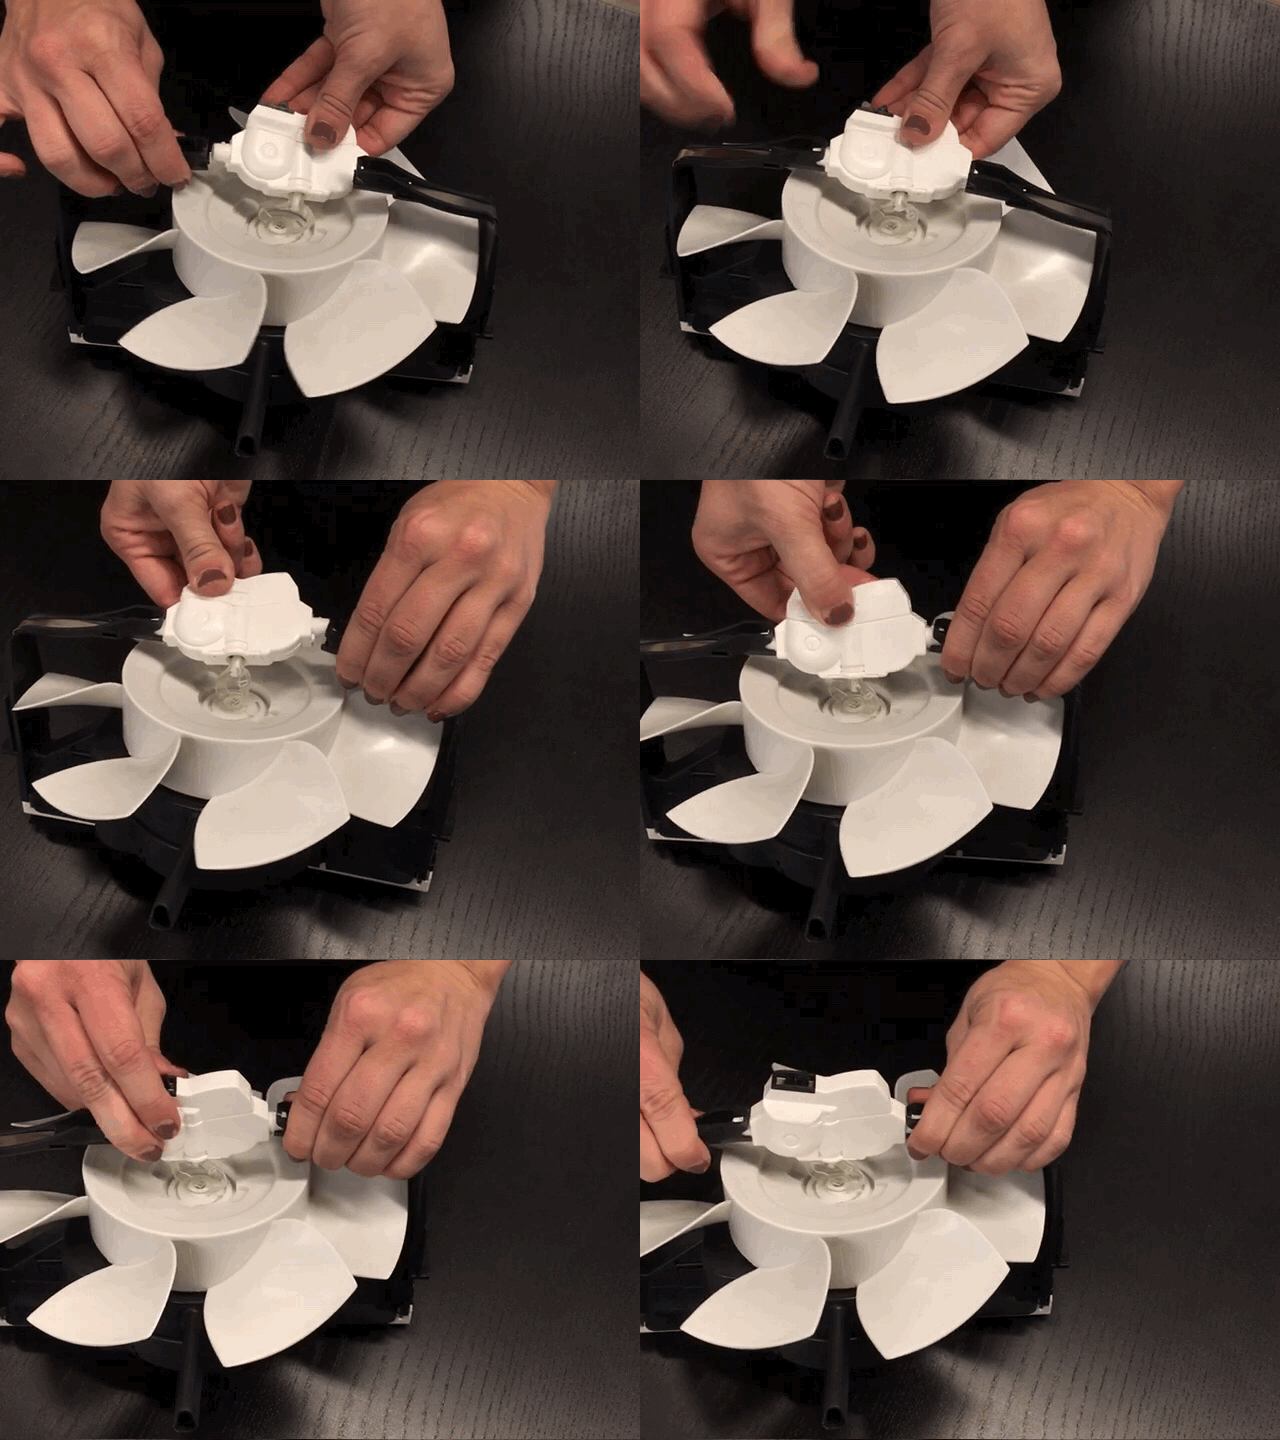
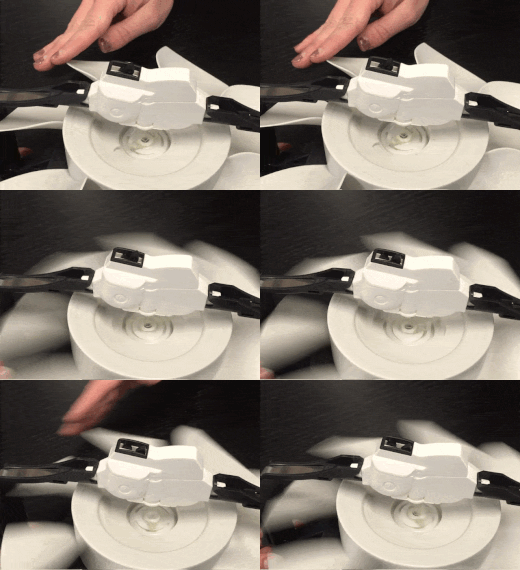
With the gear lying on its side, place it between the motor housing arms that suspend it above the fan. While placing the palms of your hands against the motor housing arms, apply slight pressure, pivoting the gear to the upright position. Check that the locking knob (the small white bump on the ends of the gears arm) fits tightly behind the ridge of the motor housing suspension arm.
Step 11
Check to make sure that this is properly attached by spinning the fan blades with your hand. The black teeth in the gear should slowly move in and out.
Step 12
If the gear is working, re-insert the motor assembly, making sure to plug the motor in during the process.
Step 13
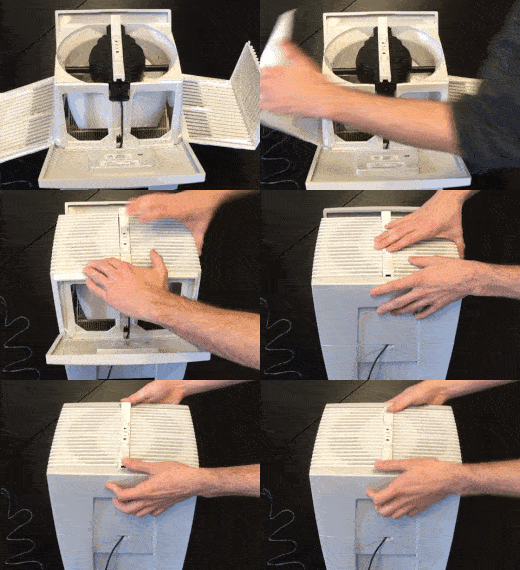
Close the upper housing, and your humidifier is good to go!
How to clean the gear box
If you are experiencing a clicking noise or your disc stack(s) are not rotating in your Classic, Original, or Comfort Plus Humidifier, follow the instructions below to clean the gear box.
Step 1
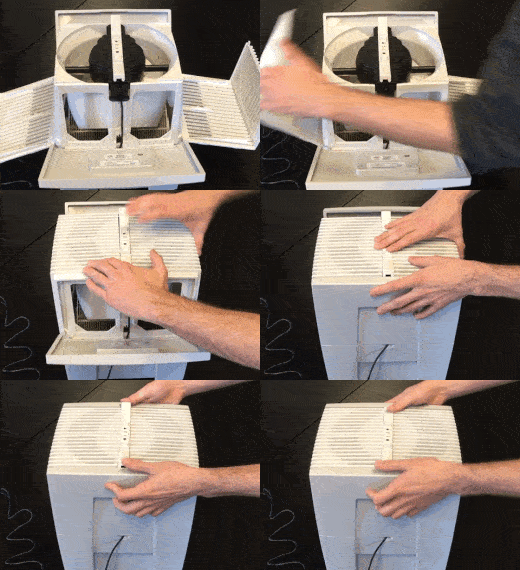
Press the tabs to the right and left of the speed controls in the center top of the upper housing unit to open the humidifier. Press the tabs at the same time.

Step 2
Pull the two vented and two non-vented sides to open the upper housing unit. Unplug the power cord from the motor, and lift the entire motor away from the upper housing unit.

Step 3
Unplug the power cord from where it connects to the motor (on the older model humidifiers the power cords are permanently attached to the motor and you will need to open the trap door on the left non-vented side to pull the cord inside the unit). Lift the entire motor and cord away from the upper housing unit.

Step 4
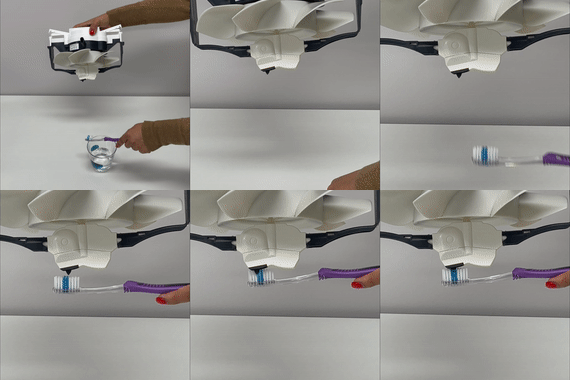
With the gear box facing down, start gently scrubbing the teeth with a toothbrush or other soft-bristled brush along with a solution of half water and half white vinegar.
Step 5
Manually spin the fan to allow cleaning access to both teeth.
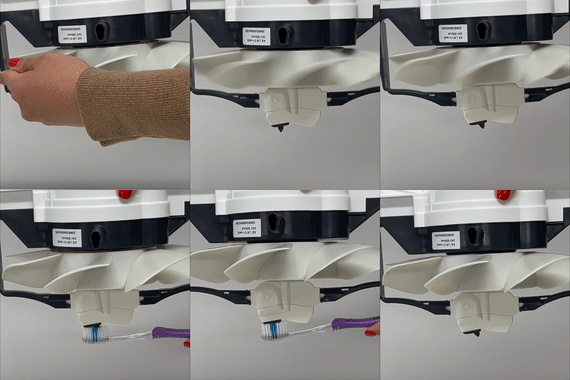
Step 6
Re-insert the power cord and motor assembly.

Step 7
Close the upper housing, and your humidifier is good to go!
How to test the motor
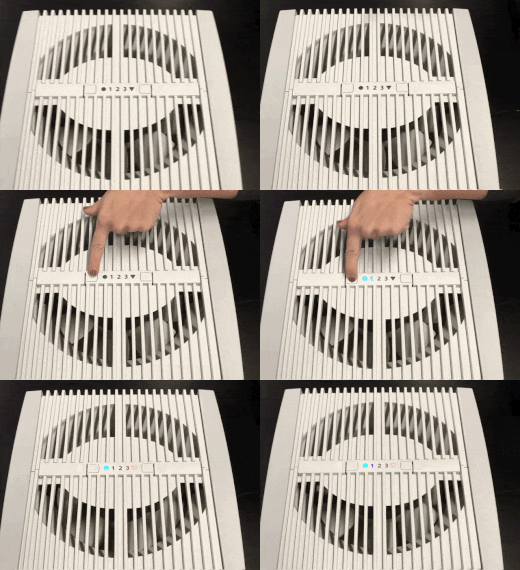
If you are seeing the red light (or two flashing lines on the Comfort Plus display) and are unsure if they are being caused by the motor, follow the below instructions to test your motor. If you are still having red light/flashing line issues after the cleaning, please contact us by calling 888-333-8218, or by emailing us at [email protected].
Step 1
Keeping your unit plugged in and turned on, check that the red light (or flashing lines on the Comfort Plus) is turning on.
Step 2
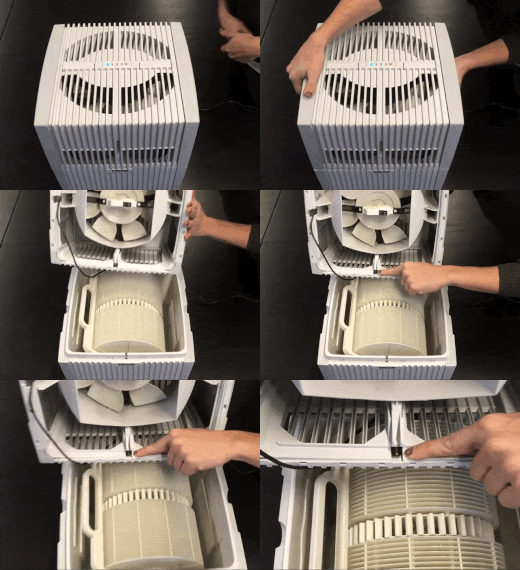
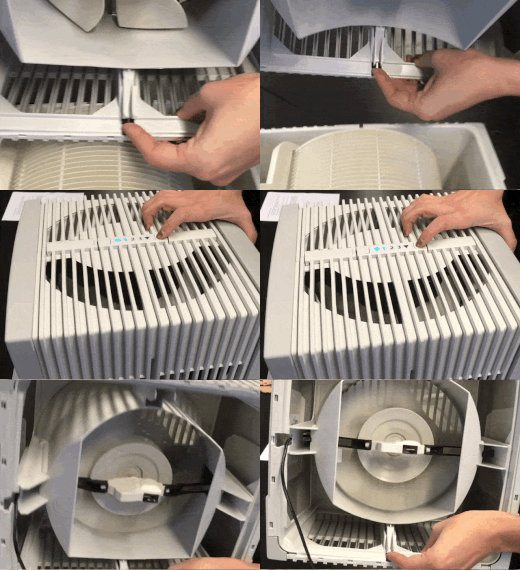
Place the upper housing unit on its side so that it is resting on the vented slotted side with the speed controls facing away. Looking at the unit from underneath so that you can view the fan blades, locate the metal connector that is located along the bottom edge of the housing unit in the middle. This connector looks like a staple.
Step 3
While holding one end of the metal device push the metal connector down while at the same time reach around the unit and press the power button. This should activate the motor and the fan should spin.
How to Replace the Motor
If you have purchased a new motor and need to install it in your Venta Humidifier, follow the instructions below. If you have any questions, please contact us using by calling 888-333-8218, or by emailing us at [email protected].
Step 1
Press the tabs to the right and left of the speed controls in the center top of the upper housing unit to open the humidifier. Press the tabs at the same time.

Step 2
Pull the two vented and two non-vented sides to open the upper housing unit. Start with the non-vented sides followed by the two long vented sides. For older models (LW14/LW24/LW44) start with the long vented sides first.

Step 3
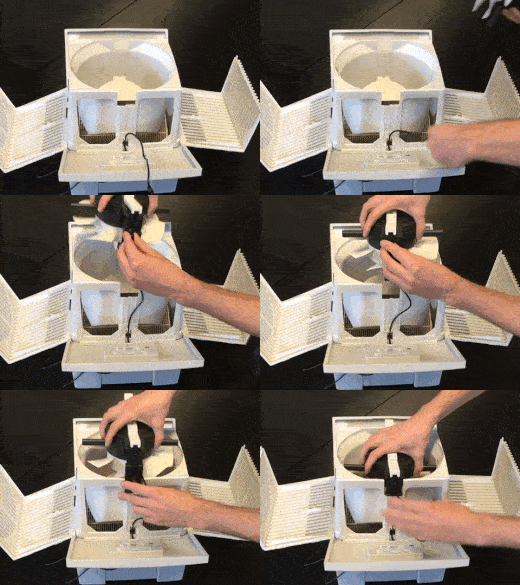
Unplug the power cord from where it connects to the motor (on the older model humidifiers the power cords are permanently attached to the motor and you will need to open the trap door on the left non-vented side to pull the cord inside the unit). Lift the entire motor and cord away from the upper housing unit.

Step 4
Insert the new motor assembly, making sure to plug the motor in during the process. Helpful hint: Put the lower part of the metal strip in first so that it is secure.
Step 5
Close the upper housing, and your humidifier is good to go!
How to Clean an Original, Comfort Plus, or Original Connect Humidifier (Regular Maintenance every 10-14 Days)
Every 10-14 days you should give your Venta Humidifier a good cleaning. Follow the instructions below to most effectively clean your humidifier. If you have any questions, please contact us by calling 888-333-8218, or by emailing [email protected].
Step 1
Press the tabs to the right and left of the speed controls in the center top of the upper housing unit to open the humidifier. Press the tabs at the same time.

Step 2
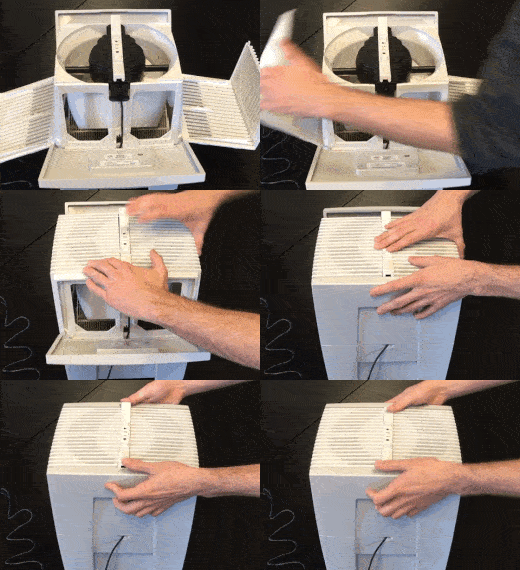
Pull the two vented and two non-vented sides to open the upper housing unit. Start with the non-vented sides followed by the two long vented sides. For older models (LW14/LW24/LW44) start with the long vented sides first.

Step 3
Unplug the power cord from where it connects to the motor (on the older model humidifiers the power cords are permanently attached to the motor and you will need to open the trap door on the left non-vented side to pull the cord inside the unit). Lift the entire motor and cord away from the upper housing unit.

Step 4
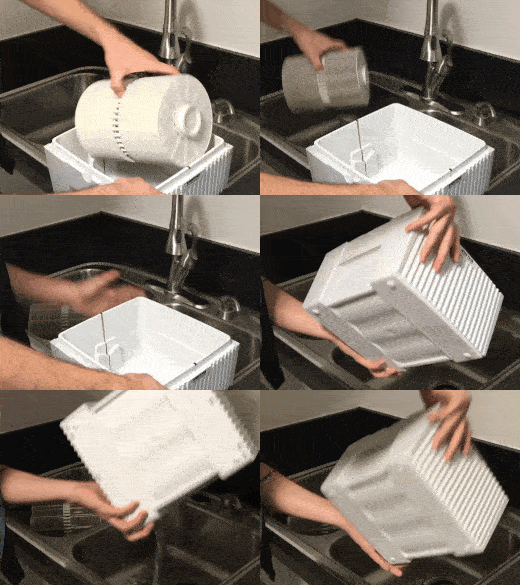
Empty the water from the lower housing of the unit.
Step 5
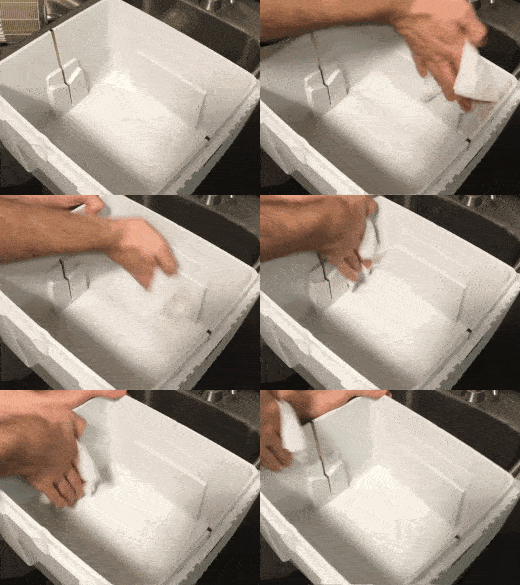
Wipe the fan blades and the upper and lower housing units with a wet, lint-free microfiber cloth. Rinse with warm water.
Step 6
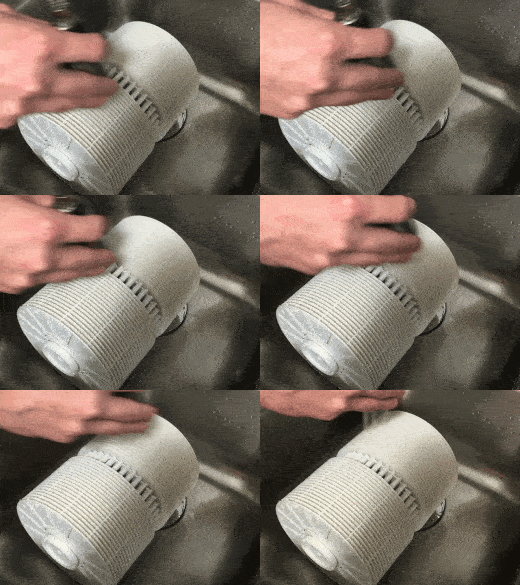
Rinse the collection disk stack or stacks with warm water, but do not use the microfiber cloth.
Step 7
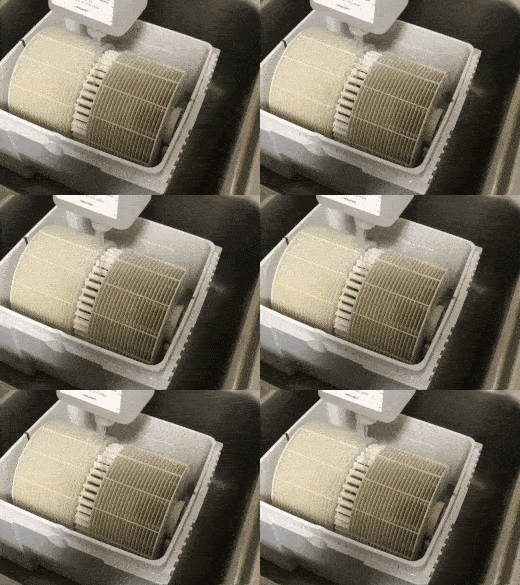
Refill the lower housing of the unit with clean water and then put in a single dose (from one black line to the next on the back of the bottle) of Venta Water Treatment Additive for extra protection.
Step 8
Close the upper housing, and your humidifier is good to go!

How to Deep Clean an Original, Comfort Plus, and Original Connect Humidifier
Follow the instructions below every six months or before long-term storage of your Venta Humidifier.
Step 1
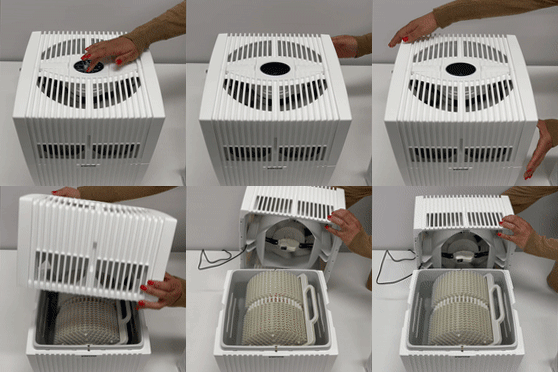
Turn off the power to the humidifier. Lift the upper housing off of the lower housing and set it aside.
Step 2
Empty the water from the lower housing and refill it with fresh water to the water line. Add the entire bottle of Venta Humidifier Cleaner to the lower housing of the unit.
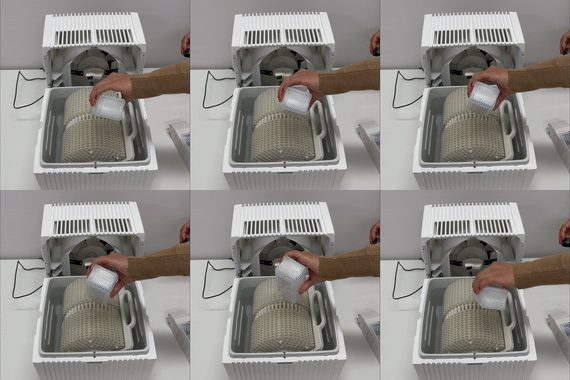
Step 3
Run the humidifier on the lowest setting for approximately two hours.
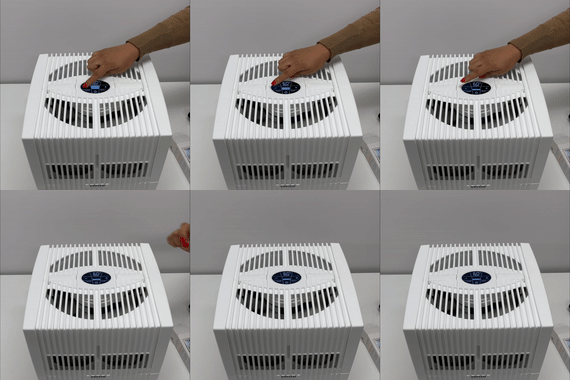
Step 4
Empty the lower housing and rinse the disc stack(s) and lower housing.
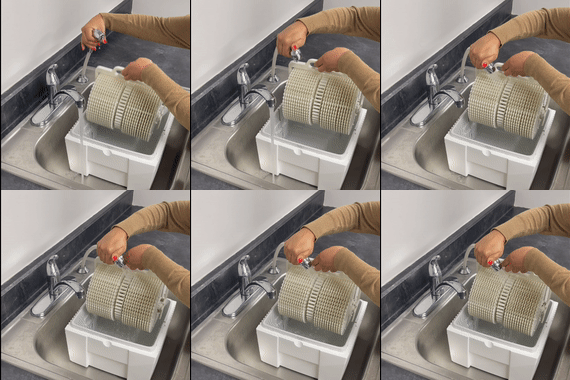
Step 5
Fill the lower housing with fresh water. Add one dose of Venta’s Water Treatment Additive, and your humidifier is good to go!
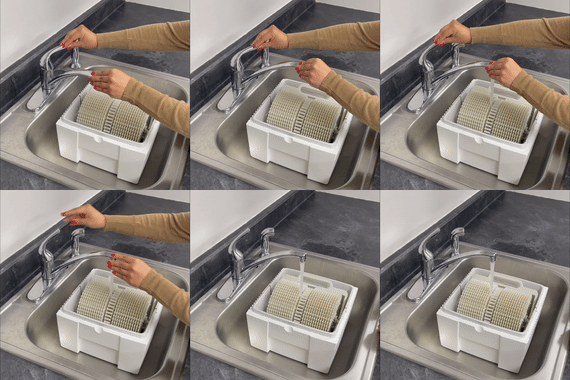
How to Service a 6 Series/Professional Series (Regular Maintenance every 14 days)
When your unit alerts you that it is time to service your humidifier or Airwasher every 14 days, follow the steps below for regular maintenance.
Step 1
Slide the water basin out of the unit. Remove the water tank from the water basin.
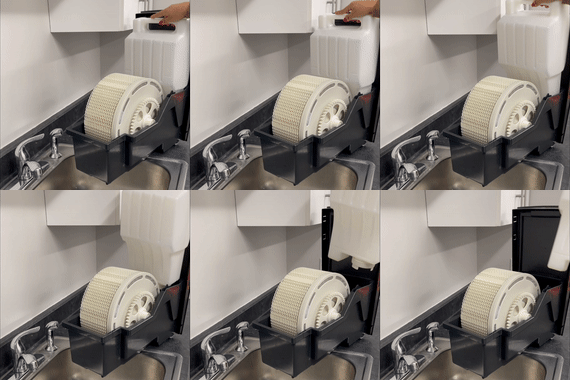
Step 2
Rinse the disc stack inside the water basin. After a thorough rinse, remove the disc stack from the water basin.
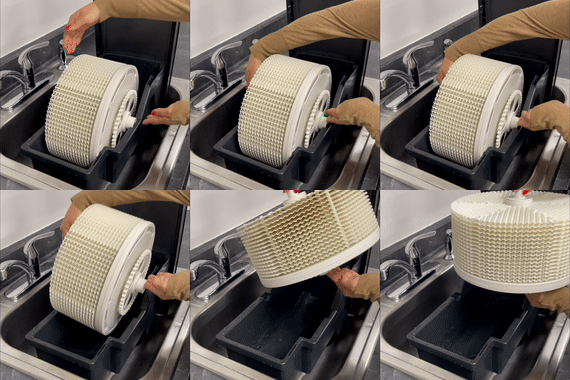
Step 3
Empty and rinse the entire water basin.
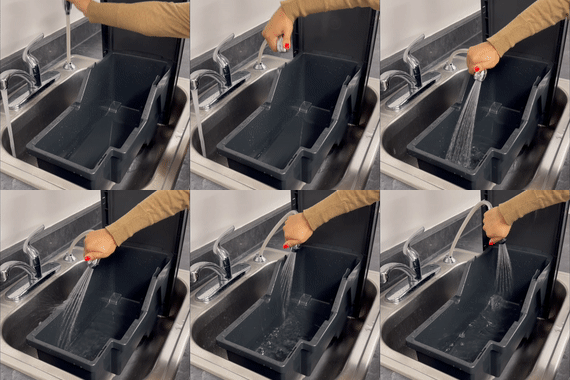
Step 4
Re-insert the disc stack back in place.
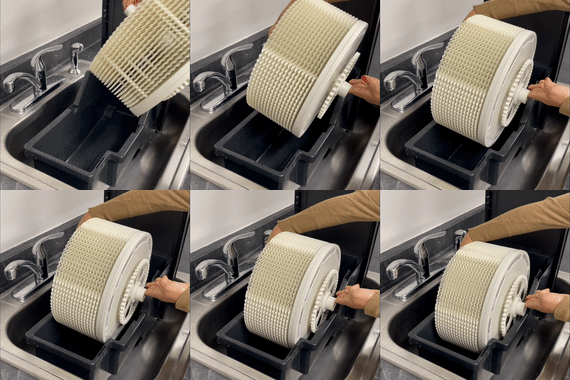
Step 5
Fill the tank to the water line and re-insert the water tank back in place. Slide the water basin back into the unit, and your device is ready to go!
